In this blog I will tell you how we can attach a data disk to an Azure Virtual Machine using Azure Portal.
We can also upload an existing data disk from on-premise data center to Azure and then add that disk as data disk to a VM.
- Navigate to the new Azure Portal at https://portal.azure.com and sign in.
- From Menu, click Virtual Machines and select your Virtual Machine that you have already created.
- On the left pane, under setting, click Disks.

4. A new window pane gets opened with two choices Attach New and Attach existing.

5. Click on Attach New
6. Fill out the details: Name of new disk as your choice, Type, Size of data disk, Location of the storage account.
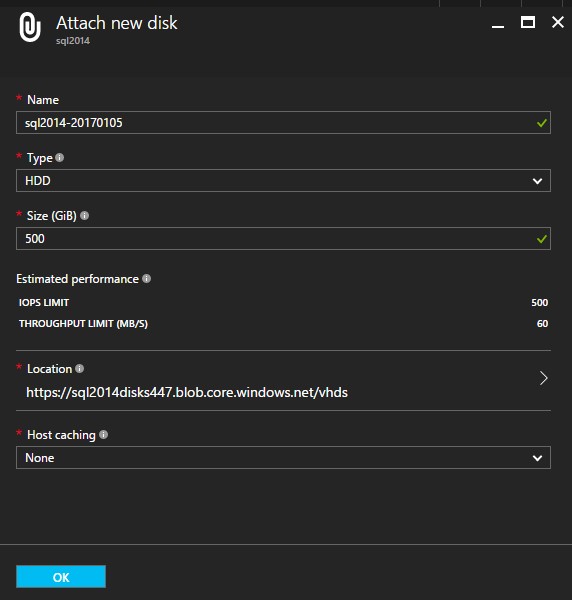
7. Click OK.
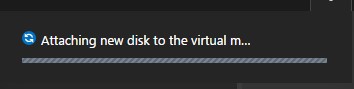
8. On the menu bar, you can monitor the alert for progress as attaching new disk to the virtual machine.
9. Verify that you have attached a new data disk to your virtual machine.

So, in this way you can attach the data disk to your Azure virtual machine.
